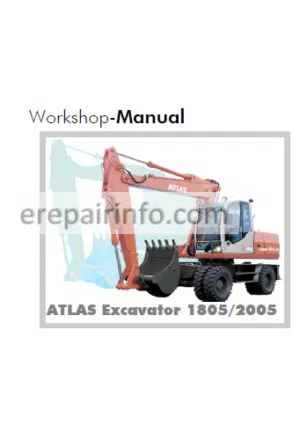
Factory Service Repair Manual For Terex Atlas 1305 1505 1605 1705 Excavator. Tons of illustrations, instructions, diagrams for step by step remove and install, assembly and disassembly, service, inspection, repair, troubleshooting, tune-ups.
Format: PDF
Language: English
Pages: 508
Bookmarks: Yes
Searchable: Yes
Wiring Diagrams: No
Hydraulic Diagrams: Yes
Model
Terex Atlas 1305, Atlas 1505, Atlas 1605, Atlas 1705
Contents
- Contents
Technical data - – Display and controls
General view of cab
Seat with consoles
Left switch panel
Right switch panel
Control and display
Control panel heating and air conditioning - – Engine
EMR
Application of the EMR
System description
Basic equipment
System functions
Pressure maintenance valves
Technical data - – Vehicle engine
Instructions for repairs to the vehicle engine
Cross section vehicle engine
Cross section travel motion control valve - – Pump
Instructions for the repair of a variable pump
Study view of the variable pump - – Pilot control equipment
Dozer blade/support pads
Principle of hydraulic function
Folding jib, slewing, lifting/lowering, bucket/grab
Structure
Function
Sectional view pilot control equipment
Diagram regulating piston - – Control block
Function of the control block
Control block construction
Control Block Picture - – Main rotation connection
Rotation connection and rotary transmission lead-through
Maintenance of the rotary connection - – Slewing gear gears and motor
Gearbox
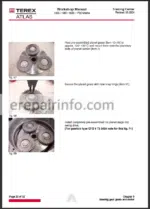
Disassembly Gearbox
Assembly Gearbox
AF 10 FD slewing gear motor - – Pressure setting tables/setting regulations
Pressure setting table
7Setting regulations
Test ports
Bleeding the equipment
Fuel admission pressure
Pilot control
LS regulator, Dp setting
Pressure cut-off
Secondary valves
Raising the pressure P
Setting the secondary valve
Setting the pressure P
“Slew” secondary valve
Setting the “slew left/right” secondary valve
Setting the brake pressure
Setting the TC valve
Reverse current throttles
reverse current throttle device
Lifting cylinder open-circuit guard
Setting the switch-on of the locking piston
Adjusting the “lower” reverse-current throttle device
Secondary valves
Open-circuit guard for the articulated cylinder
Checking/adjusting the cardan shaft speed
Checking/adjusting the “drive” pilot control pressure
Centring actuator shut-off device with no oil overflow
Checking/adjusting the secondary valve - – Cylinders
Construction of the cylinders
Jointed cross shaft axle lock cylinder
Blade cylinder
Shovel tilting cylinder 1305
Articulated cylinder
Adjusting cylinder
Lifting cylinder - – Hydraulic accessories
Claw support – 4 supports
Operable at the same time
Check valve, pilot-operated
Integral check
Pilot control block
Power shift gear
Power brake system
Structure
SETTING REGULATION
Shut-off valve
Foot brake
Axle blocking
Functional description
Putting into operation and de-aeration
Trouble-shooting
Repair Guide (see picture 3)
Pendulum axle lock cylinder
Multi-function valve
Pipe break safety device
Function description RBS
Pipe-break safety device 1305
Pipe-break safety device 1505 / 1605 - – Air conditioner system
Use
Technical Data
Functions on the control elements
Overview
Control
Detailed description of the functions
Air distribution
Fan
Temperature plate
Switch for the air conditioner
Radio button for fresh air and ambient air
Description of the functions in the background
Auxiliary heating
Pressure switch in the refrigeration cycle
Temperature sensor
Combustion engine
Ignition key (terminal 15) and switching on the control unit
Switching off the ignition
Air conditioning of the cabin
Pane defrosting
Heating
Operation of the air conditioner
Heating air conditioner
Place of installation
Description of the cooling cycle components
Capacitor for the excavator models
Dryer with push button collector
Maintenance
Error diagnosis - – Power shift transmission
Valve block for Gearbox control
Operation
General
Driving and switching gears
Parking brake
General
Parking
Towing away
Maintenance
Type of oil
Checking the oil level
Oil change and oil fill-up quantity
Charts
INSTRUCTIONS FOR REPAIR
General instructions
Important information on working safety
Designation of statutory units
Tightening Torques
Gear structure
Instructions for commencement of operation, operating and maintenance
Installation overview and instructions on filling up with oil
Instructions on moving or towing away the vehicle in an emergency
Examples of tooth contact for Gleason-type gear teeth
RList of tools for assembling and disassembling
2 HL 100 switch protection
Shift protection device
Powershift transmission
Dismantling
Removing the clutch
Removing and dismantling the planetary drive
Switching off and removing and dismantling the spur wheel
Dismantling the shift protection device
Dismantling the drive output, axle drive housing and differential
ASSEMBLY
Axle drive housing, drive output and differential
Installing the helical gear and the shut-off device
Completing and installing the pinion cage
Pre-assembling and installing the coupling (on-the-road gear)
Checking the imperviousness and functioning of the coupling (Illustration 188…190)
Installing the brakes (off-the-road gear)
Mounting the drive housing
Checking that the brakes do not leak and that they function (off-road gear),
Pre-assembling and installing the shift protection
Installing the lubrication oil pump
Installing the screw plugs and the oil lines
Dismantling the drive output
Mounting the drive output
Gear switch protection
Dismantling, see also picture chart on pages 38 and 120!
Assembly, see also picture chart on pages 38 and 120 - – Electrical System
- -Axles
planetary steering axle
planetary rigid axle - – Hydraulic circuit diagrams
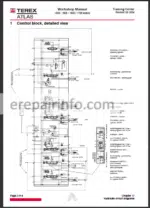
Control block, detailed view
hydraulic circuit diagram - – Maintenance
Safety instructions for maintenance
Renewing hydraulic fluid filter element
Renewing fuel filter
Changing engine oil, renewing engine oil filter
Maintenance schedule - – Miscellaneous
Repair Instruction for Welded Assemblies
Introduction
Service consultation
Area of application
General problems
Damage evaluation
General
Course of crack
Consulting the Service organization
General
Doubler of metal sheet
Drawings / Examples
Preparing the repair
Cleaning
Drilling
Grinding
Preheating the welding area
Qualification of the welding personnel
Selecting the filler metal
Welding wire selection
Repair sequence
Followup work
What you get
You will receive a PDF file with high-quality manual(s) on your email immediately after the payment.


Reviews
There are no reviews yet