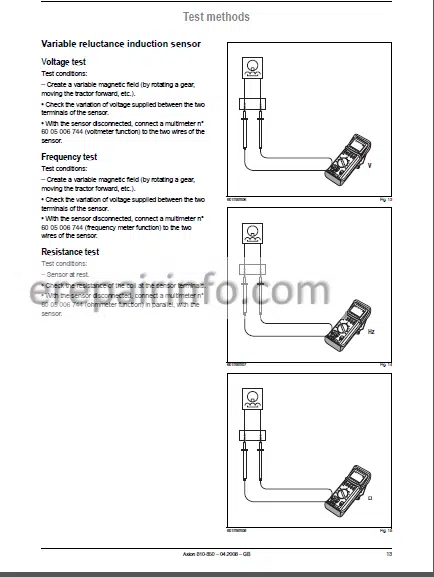
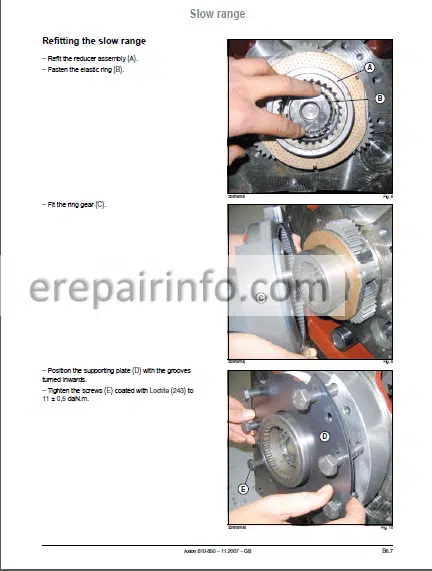
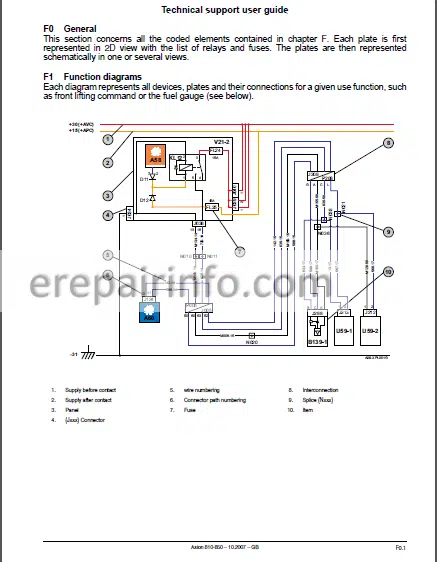
Factory Service Repair Manual For Claas Renault Axion 810 820 830 840 850 Tractors. Tons of illustrations, instructions, diagrams for step by step remove and install, assembly and disassembly, service, inspection, repair, troubleshooting, tune-ups.
Format: PDF
Language: English
Pages: 2164
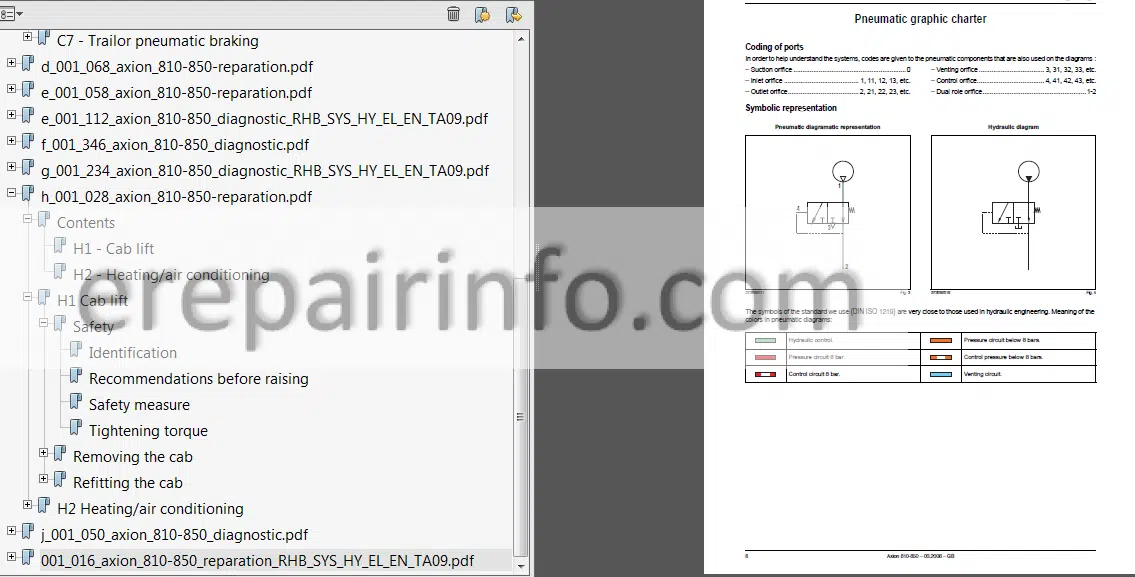
Bookmarks: Yes
Searchable: Yes
Wiring Diagrams: Yes
Hydraulic Diagrams: Yes
Model
Claas Renault Axion 810, 820, 830, 840, 850
Contents
-ARCHITECTURE TYRES CLAAS COMPONENT NUMBER (CCN)
–ARCHITECTURE TYRES
—DESCRIPTION
Component Layout
—CLAAS COMPONENT NUMBERS
Families Of Pneumatic Ccn
Con List
–PNEUMATIC GRAPHIC CHARTER
Coding of ports
Symbolic representation
-TIER III DPS ENGINE
-ENGINE
Description
Identification
Torque Settings And Sealants
–INJECTOR INSTRUCTION SHEETS
Axion 810
Axion 810 -Cmatic
Axion 820
Axion 820 -Cmatic
Axion 830
Axion 840
Axion 840 -Cmatic
Axion 850
–ELECTRONIC INJECTION
Electronic Injection Circuit
Injector Command
High Pressure Pump Piloting
Injection System
Operating Summary
Fuel Filter
Fitters
Injectors
Description
Operating Summary
At Rest
Injection
End Of Injection
High Pressure Pump
Description
Technical Description
Common Rail
Description
Functional Logic
Return Connector
Description
Operating Summary
Tank Connections
Description
–MEASUREMENTS AND CHECKS
Checking The Fuel Supply Pressure
–RESULTS RECORD FORM
Supply Pressure
–INLET AND EXHAUST
Description
Schematic Dagram
Electronic Components
Description
Operating Summary
Piloting 1З«
Operation Of The Exhasut G3S Recirculation Valve
V3Lve Displacement
Informs On The Actual Position
Zone Of Use
Hydraulic Part
Description
Technical Description
Mechanical Part
Cylinder Head 3Nd Valves
Turbocharger
Egr System
–START
Description
Start-Up Circuit
Engine Management When Starting
Work Of The Eng Module When Starting
Functional Logic
–PREHEATING SYSTEM
Pre-Postheating System
Description
Component Layout
Operating Summary
–LUBRICATION
Description
Schematic Diagram
–MEASUREMENTS AND CHECKS
Checking The Oil Pressure
–RESULTS RECORD FORM
Engine Oil Pressure
–COOLING
Description
Electronic Components
Description
Component Layout
Functional Logic
Hydraulic Part
Internal Cooling Circuit
Thermostat Units
Description
Technical Description
–MEASUREMENTS AND CHECKS
Checking The Thermostat
–MANAGEMENT AND AUTOMATION
Engine Speed Management
Settng Speed
Idle Speed
Protection
–PROTECTIONS AND AUTOMATION
Supply Of The Eng Module
Engine Speed
Engne Speed Sensors
Engine Temperature
Fuel System
Egr System
Protections Around The Egr Valve
Protection In Respect Of The Temperature Of The Compressed Fresh Air
Protection In Respect Of Recycled G3S Temperature
Protection In Respect Of The Mixed Ar Temperature
Turbocharger
Turbocharger Protection
–ADDITIONAL POWER MANAGEMENT
Additional Power Management
Operating Summary
-ENGINE DPS TIER III
–GENERAL
Specific Torque
Blocking Between The Motor Oil Casing’front Axle Chassis
-– CYLINDER HEAD AND VALVES
Local Manufacturing Tool
Injector Socket Extractor
Rocker Calper
Inspecting Valve Bridges
Inspecting The Rocker Pin
Inspecting The Rockers
Measuring Valve Shrinkage
Cylinder Head Flatness
Measuring Cylinder Head Thickness
Valve Guide Measurement
Measuring The Valve Seat Bore In The Cylinder Head
Measuring The Valve Springs
Measuring The Valves
Inspecting The Turbocharger
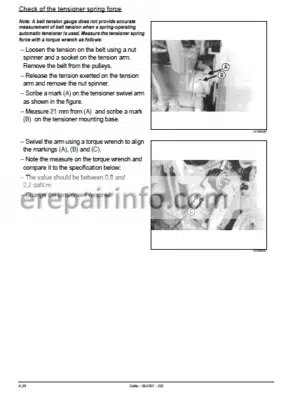
Checking The Belt Tensioner Spring
Removing The Alternator And Alternator Bracket
Refitting The Alternator And Bracket
Removing The Viscouc Coupling
Refitting The Viscous Coupling
Removing The Fan Hub And Bracket
Refitting The Fan Hub And Bracket
Removing The Turbocharger
Refitting The Turbocharger
Removing The Turbocharger Rod Linkage
Refitting The Turbocharger Linkage
Removing The Exhaust Manifold
Refitting The Exhaust Manifold
Removing The Cooler And Ducts Egr
Refitting The Cooler And Ducts Egr
Removing The Thermostat Cover
Refitting The Thermostat Cover
Removing The Thermostat Manifold
Refitting The Thermostat Cover
Removing The Cylinder Head Cover
Refitting The Cylinder Head Cover
Removing The Rocker Arm Assembly
Refitting The Rocker Shaft
Adjusting The Valve Rockers
Method Of Adjustment
Removing The Rocker Carrier
Refitting The Rocker Carrier
Removing The Injector Socket
Removing The Injector Socket
Removing The Cylinder Head
Preparation
Refitting The Cylinder Head
Refitting The Valve And Joint
Refitting The Valve And Gasket
Removing The Valve Seats
Refitting The Valve Seats
Removing The Intake Manifold
Refitting The Intake Manifold
Removing The Air Diffuser
Refitting The Air Diffuser
Removing The Egr Valve
Refitting The Egr Valve
-–LINERS, PISTONS AND CONNECTING RODS
Measuring The Counterboring Depth Of The Liner Flange In The Block
Measuring The Liner Flange
Measuring Flatness Of The Plate And The Plate’crankshaft Bearing Distance Measuring The Piston Pin Borehole
Measuring The Piston Skirt
Measuring The Piston Height
Measuring Piston – Liner Clearance
Inspecting And Measuring Connecting Rod Bearings
Inspecting The Connecting Rod And The Cap
Inspecting The Piston Pins And Rings
Measuring The Bore Of The Connecting Rod Pin
Measuring The Centre Distance Between Connecting Rod Bores
Measuring The Piston Overlap
Dismantling Of The Connecting Roopiston Assembly
Removing The Pistons/Connecting Rods And Rings
Removing The Pisotn Pin Bush
Disassembling The Liners
Deglazng Cylnder Iners
Removing The Cylinder Block
Refitting The Cylinder Block
Refitting The Liners
Refitting Piston Pin Rings
Refitting The Pistons/Connecting Rods And Piston Rings
Reassembling Pistons And Connecting Rods
-FLYWHEEL, BEARING, AND CRANKSHAFT
Measuring The Inner Diameter Of The Crankshaft Journals And Bearings
Measuring The Width Of Journals And Thrust Bearings
Checking Axial Clearance Of The Crankshaft
Removing The Damper Pulley
Refitting The Damper Pulley
Removing The Front Bearing Gasket
Refitting The Front Bearing Seal
Removing The Flywheel
Removing Thee Flywheel’s Toothed Crown Gear
Refittng The Flywheel’s Toothed Crown Gear
Refitting The Flywheel
Removing The Rear Bearing Gasket
Refitting The Rear Bearing Gasket
Removing The Flywheel Cover
Reassembling The Engine Flywheel Casing
Removing The Timing Wheel
Refitting The Timing Wheel
Removing The Crankshaft Pinion
Refitting The Crankshaft Pinion
Removing The Crankshaft Bearings And The Crankshaft
Refitting The Crankshaft Bearings And The Crankshaft
-TIMING AND BALANCING SHAFT
Measuring The Bore Of The Camshaft Bush
Measuring Axial Clearance Of The Camshaft
Measuring The Diameter Of The Camshaft Bush And Journals
Measuring The Cam Height
Measuring Axial Clearance Of The Idle Gear
Measuring Clearance Between The Teeth Of The Timing Gears Disassembly Of The Water Pump
Disassembly Of The Water Pump
Reassembling The Water Pump
Refitting The Water Pump
Disassembly Of The Distributor Casing
Refitting The Pressure Regulator
Refitting The Pressure Regulator
Removing The Camshaft And Wear Bush
Camshaft
Wear Bush
Refitting The Camshaft And Wear Bush
Wear Bush
Camshaft
Removing The Front Plate
Reassembly Of The Front Plate
Injection Timing Setting
Refitting The Timing Cover
–INJECTION ASSEMBLY
Removing The Supply Pump
Refitting The Supply Pump
Removing The High Pressure Common Rail
Refitting The High Pressure Common Rail
Removing The Flow Regulators
Refitting The Flow Regulators
Removing The Pressure Restricter
Refitting The Pressure Restricter
Removing The High Pressure Pump
Refitting The High Pressure Pump
Removing The HKЭH Pressure Pump Filter
Refitting The High Pressure Pump Filter
Removing The Solenoid Valve
Refitting The Solenoid Valve
Removing The Electronic Injectors
Refitting Electronic Injectors
–LUBRICATION SYSTEM
Removing The Oil Alter And Holder
Refitting The Oil Filter And Holder
Removing The Oil Cooler
Refitting The Oil Cooler
Removing The Engine Oil Pan
Disassembly Of The Oil Pump
Reassembling The Oil Pump
Refitting The Engine Oil Pan
-GEARBOX
–GENERAL
Main Adjustments
Specific Torques And Sealing Compounds
Dismantling Procedure
Operation Of Control Unit 60 05 006 156R0B0T-Driven Ranges
–HEXASHIFT
Local Manufacturing Tool
Support Rods Of The Hexashift And Revershift Casing
Exploded View
Removing The Hexashift Module
Removing The ‘B228-2’ Engine Speed Sensorfon Gearbox Entry Shaft)
Removing The “Hexashift Module
Removing The “Hexashift Module
Refitting The “Hexashift Module
Adjusting The ‘B228-2’ Engine Speed Sensor With Tractor Uncoupled
Adjusting The ‘B228-2’ Engine Speed Sensor With Tractor Coupled
Refitting The “B228-2” Engine Speed Sensor
–“REVERSHIFT”
Locally Made Tool
Elastic Washer Compressor On Forward Clutch
Exploded View
Removing The “Revershift Module
Removing The “Revershift Module
Removing The Reverse Clutch
Deremoving The Forward Clutch
Refitting The “Revershift Module
Refitting The Clutch (Forward Gear)
Refitting The Clutch (Reverse Gear)
Refitting The “Revershift Modulerepose Du Module
Access To Forward Clutch Without Removal
–ROBOT-DRIVEN RANGES
Locally Made Tool
Support Rods Of The Robot-Driven Ranges Module
Pneumatic Fitting (For Supply Of The Robot-Driven Ranges Circuit)
Rod For Dimensioning The Reverse Gear
Exploded View
Removing The Ranges Module
Removing The Ranges Module
Removing The Primary And Secondary Lines
Removing The Primary Line
Shimming Of Tapered Roller Bearings
Synchroniser Cover Adjustment
Refitting The Primary Line
Removing The Secondary Line
Refitting The Secondary Line
Shimming Of Tapered Roller Bearings
Adjusting The Shafts In The Housing
Measuring Shaft Clearance In The Casing
Refitting The Ranges Module
Adjusting The Stop Nuts Of The Ranges Module
Adjusting The Ranges Module Banning Lock
Refitting The Ranges Module
-4WHEEL DRIVESHAFT
Locally Made Tool
Guide Of The 4 Wheel Drive Shaft
Preparation
Exploded View
Removing The 4 Wheel Drive Shaft
Removing The 4 Wheel Drive Shaft
Refitting The 4 Wheel Drive Shaft
Procedure For Shimming The 4 Wheel Drive Shaft
Refitting The 4 Wheel Drive Shaft
-SLOW RANGE
Exploded View
Removing The Slow Range
Removing The Reducer Assembly
Refitting The Reducer Assembly
Refitting The Slow Range
Adjusting The Actuation Device
Adjusting The Slow Range Lever
-“HEXASHIFT” GEARBOX
-“HEXASHIFT” GEARBOX
Description
Technical Specifications
Functional Logic
Hexashift Module Piloting Law
Revershift Module Piloting Law
Range Modules Piloting Law
Slow Range Module Piloting Law
–ADJUSTMENT
Main Shimming
Specific Torques And Sealing Compounds
–“REVERSHIFT”
Description
Schematic Diagram
–MANUAL CALIBRATION
Static Calibration Of Clutches
Calibrating The Clutches
–ELECTRONIC COMPONENTS
Description
Functional Logic
Automatic Piloting Law (Lever)
Manual Piloting Law (Pedal)
Passage Under Torque Law (Hexashift)
Electronic Protection
–HYDRAULIC PART OF THE LUBRICATION
Description
Technical Specifications
–MEASUREMENTS AND CHECKS
Lubrication/Boost Pressure Check
–RESULTS RECORD FORM
Lubrication/Boost Pressure Check
–MECHANICAL PART
Description
Schematic Diagram
Functional Logic
Characteristics
Reverse
Description
Schematic Diagram
Functional Logic
Characteristics
Forward
Description
Schematic Diagram
Functional Logic
Characteristics
–HYDRAULIC PILOTING PART
Description
Component Layout
Technical Specifications
–MEASUREMENTS AND CHECKS
Checking The Control Pressure
Checking The Accumulator Rating Pressure
Checking The Piloting Law Of The revershift Module
–RESULTS RECORD FORM
Checking The Control Pressure
Checking The Accumulator Rating Pressure
Checking The Piloting Law Of The revershift Module
–“HEXASHIFT”
Description
–ELECTRONIC COMPONENTS
Description
Functional Logic
Electronic Protection
–HYDRAULIC PART OF THE LUBRICATION
Description
Technical Specifications
–MEASUREMENTS AND CHECKS
Lubrication / Boost Pressure Check
–RESULTS RECORD FORM
Lubrication I Boost Pressure Check
–MECHANICAL PART
Description
Schematic Diagram
Functional Logic
Characteristics
–MODULE 4 “POWERSHIFT”
Description
Schematic Diagram
Functional Logic
Gear Ratio: 058
Gear Ratio: 069
Gear Ratio: 083
Gear Ratio: 1
–SPEED INCREASER GEARING
Description
Schematic Diagram
Functional Logic
Ge3R Ratio: 1
Gear Ratio: 14
–HYDRAULIC PILOTING PART
Description
Functional Logic
Characteristics
–MEASUREMENTS AND CHECKS
Checking The Control Pressure
Checking The Accumulator Rating Pressure
Checking The Piloting Law Of The ‘hexashift’ Module
–RESULTS RECORD FORM
Checking The Control Pressure
Checking The Accumulator Rating Pressure
Checking The Piloting Law Of The ‘hexashift’ Module
–ROBOT-DRIVEN RANGES
Description
Schematic Diagram
–ELECTRONIC COMPONENTS
Description
Functional Logic
Electronic Protection
–HYDRAULIC PART OF THE LUBRICATION
Description
Technical Specifications
–MEASUREMENTS AND CHECKS
Lubrication/Boost Pressure Check
Checking The Flow Rates And Pressure At Cooler Inlet
Checking The Flow Rate And Pressure At Cooler Outlet
–RESULTS RECORD FORM
Lubrication/Boost Pressure Check
Checking The Flow Rates And Pressure At Cooler Inlet
Checking The Flow Rate And Pressure At Cooler Outlet
–MECHANICAL PART
Description
Schematic Diagram
Functional Logic
Kinematics Range (A)
Kinematics Range (B)
Kinematics Range (C)
Kinematics Range (D)
Synchronizer Movement
Operation Of The Range J3Ck ’A’b
Mechanical Neutral
Engaging З Range
Hydraulic Neutral
Characteristics
–HYDRAULIC PILOTING PART
Description
Technical Specifications
–MEASUREMENTS AND CHECKS
Checking The Control Pressure
Checking The Accumulator Rating Pressure
–RESULTS RECORD FORM
Checking The Control Pressure
Checking The Accumulator Rating Pressure
–SLOW RANGE
Description
Schematic Diagram
–ELECTRONIC COMPONENTS
Description
Component Layout Functional Logic
–MECHANICAL PART
Description
Schematic Diagram
Functional Logic
Not Engaged
Engaged
Characteristics
–WORK/TRANSPORT MODE
Description
–ELECTRONIC COMPONENTS
Description
Functional Logic
–HEXACTIV
Description
–ELECTRONIC COMPONENTS
Description
Auto Mode
Manual
Example
Pto Mode
Limits Of The Hexactiv
Electronic Protection
Functional Logic : Applicability A09A
Example 1: Adjusted At 1 400 Rev/Min
Example 2: Adjusted At 1 900 Rev/Min
–SHIFT TO NEUTRAL
Description
–ELECTRONIC COMPONENTS
Description
–MANOEUVRING GEAR
Description
–“SPEED MATCHING”
Description
–ELECTRONIC COMPONENTS
Description
–FUNCTIONAL LOGIC
Electronic Protection
–“SKIP SHIFT”
Description
–ELECTRONIC COMPONENTS
Description
Functional Logic
Work Mode
Road Mode
–START RATIO
Description
–ELECTRONIC COMPONENTS
Description
Functional Logic
Electronic Protection
–FRONT REAR DECOUPLING
Description
-GEARBOX”CMATIC”
–GENERAL
Specific Torques And Sealing Compounds
Main Adjustments
-CARTRIDGE “CMATIC”
Locally Made Tool
Centering Studs
Preliminary Operations
Removing The Additional Tank And Right Step
Refittng The Additional Tank And Right Step
Access To Electronic And Hydraulic Components
Removing The *Tcu A57-4′ Module
Refittng The *Tcu* Module
Removing The ’Hcu A126’ Module
Refittng The ‘hcu* Module
Removing The Cartridge Cover
Refit The Cartridge Cover
Remove The Solenoid Valves “Y232* “Y233’, “Y235* “Y236″ ’Y237″ *Y238″
Refittng The Solenoid Valves
Removing Rev Sensors ‘b299 B300*
Refittng The Rev Sensors
Removing Rev Sensors ‘bio B301, B302″
Refittng The Rev Sensors
Removing The Oil Temperature Sensor ‘bl23-2″
Refittng The Sensor
Removing The Lubrication Pressure Sensor ‘b143”
Refittng The Sensor
Removing The System Pressure Sensor ‘b298’’
Refittng The Sensor
Removing The Accumulator
Removing The Accumulator
Removing The Suction Strainer
Refittng The Suction Straner
Removing The Pressure Filter
Refittng The Pressure Fiter
Access To Cartridge ’Cmatic’
Removing The Battery/Exhausti’Pneumatic Reserve Housing
Refittng The Battery’exhausvpneumatic Reserve Housing Assembly
Removing The Cab Support
Refittng The Cab Support
Removing The Cartridge
Refittng The Cartridge
-OVERHAULING THE LINE SHAFTING IN THE GEARBOX CASING “CMATIC”
Exploded View
Removing The Primary Line
Refitting The Primary Line
Shimmng Procedure
Remove The Intermediate Line
Refitting The Intermediate Line
Removing The Secondary Line
Refitting The Secondary Line
Removing The 4 Wheel Drive Shaft
Refitting The 4 Wheel Drive Shaft
Procedure For Shimming The 4 Wheel Dnve Shaft
-GENERAL
Tightening Torques And Principal Adjustments
General Cross-Section
’5* Differential
’Nd’ Axle Tubes
’Hd’ Axle Tubes
’Hde’ Axle Tubes
Composite Axle Tubes
Gearbox’rear Axle Coupling
Rear Axle’pto Housing Coupling
–LOCAL MANUFACTURING TOOL
Rear Power Take-Off Tools
Service Brake Tools
-DRIVE PINION
–GPA 40 DRIVE PINION
General
Exploded View
Removal’refitting
Setting And Adjusting The Protrusion Distance Of The Drive Pinion
-DIFFERENTIAL
General
Exploded View
Removing/Refitting The Bearings
Removing’refitting The Differential Housing
Removing/Refitting The Differential Lock
Removing’refitting The Planet Gears Sun Gears And Ring Gear
Adjusting The Backlash
Shimming The Differential Case Roller Bearings
-REAR POWER TAKE-OFF
–POWER TAKE-OFF CLUTCH
General
Exploded View
Removal’refitting
Removing The Clutch
Refitting The Clutch
–REAR POWER TAKE-OFF UPPER SHAFT
General
Exploded View Of 540’1 000 Rpm Version
Exploded View Of 540’1 000 And 750 Rpm Version
Prevention System
Removal/Refitting
Removal/Refitting
Adjustment
Adjusting The Controls
–REAR POWER TAKE-OFF LOWER SHAFT
General
Exploded View Of 540’1 000 Rpm Version
Exploded View Of 540’1 000 And 750 Rpm Version
Power Take-Off Brake
Removing/Refitting The Lower Shaft
Adjustment
–PROPORTIONAL PTO
General
Removing/Refitting The Selection System
Removing/Refitting The Gears
Adjusting The Bearings
-AUTOMATIC BRAKE
Exploded View Of The Automatic Brake Actuation Unit
Exploded View Of Brake Mechanism
Removing’refitting The Actuation Unit
Removing/Refitting The Parking Brake
Removal/Refitting Of Brake Mechanism
Removing’refitting The Actuation Unit
Basic Parking Brake Adjustment
Adjusting The Parking Brake Control
-SERVICE BRAKE 40 AND 50 KM/H
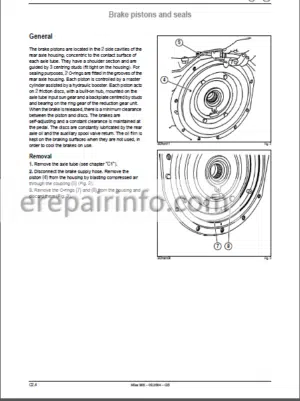
–BRAKE PISTONS AND SEALS
General
Local Manufacturing Tool
Removing The Brake Piston
Refitting The Brake Piston
Sealing Test
Draining The Service Brake Circuit
Removing The Brake Control Valve 7148
Removing The Brake Control Valve 7148
–REPLACING THE MASTER CYLINDERS
Removal/Refitting Of Master Cylinders
–ADJUSTMENT OF THE BRAKE PEDALS
High Pressure Braking
Low Pressure Braking
–BLEEDING THE BRAKE CIRCUIT
Manual Drain Of The Low Pressure Circuit
Manual Drain Of The High Pressure Circuit
Bleeding The Brake Circuit With A Pressurising Device
Bleeding The Braking Valve
Checking Effectiveness Of The Air Draining Of The 110 Umin Circuit {Bosch Valve)
-AXLE TUBES
“No” Axle Tubes
General
Exploded View
Removal
Refitting
Removing The Planet Carrier
Refitting The Planet Carrier
Removing The Roller Bearings And Seals
Refitting The Roller Bearings And Seals
Shimming The Wheel Shaft Bearings
Replacing The Wheel Stud
-HD AXLE TUBES
General
Exploded View
Removal
Refitting
Removing The Planet Carrier
Refitting The Planet Carrier
Removing The Roller Bearings And Seals
Refitting The Roller Bearings And Seals
Shimming The Wheel Shaft Bearings
Replacing The Wheel Stud
-HDE AXLE TUBES
General
Exploded View
Removal
Refitting
Removing The Planet Carrier
Refitting The Planet Carrier
Removing The Roller Bearings And Seals
Refitting The Roller Bearings And Seals
Shimming The Wheel Shaft Bearings
Replacing The Wheel Stud
–COMPOSITE AXLE TUBES
General
Exploded View
Removal
Refitting
Removing The Planet Carrier
Refitting The Planet Carrier
Removing The Roller Bearings And Seals
Refitting The Roller Bearings And Seals
Shimming The Wheel Shaft Bearings
Replacing The Wheel Stud
-REAR AXLE
-SUSPENDED FRONT AXLE
–GENERAL
Specific Torques And Sealing Products For The Joint Box
Specific Torque And Sealing Products For The Suspension
Specific Torque Ad Sealing Products Of The Bevel Gear
Specific Torque And Sealing Products Of The Differential
Specific Torque Ad Sealing Products Of The Bevel Gear
Specific Torque And Sealing Products Of The Epicyclical Reducer
Removing The Front Axle
Refitting The Front Axle
–EPICYCLOID REDUCER
Exploded View Of The Epixyxlix Reducer
Preparation
Removing The Epicyclic Reducer
Refitting The Epicyclic Reducer
–JOINT UNIT
Exploded View
Preparation To Removing The Joint Box
Removing The Joint Box
Dismantling
Refitting
Refit The Joint Box
Adjustment
-SUSPENSION
-SUSPENSION
Exploded View Of The Suspension
Removing The Suspension
Removing The Position Sensor
Removing The Bracket
Removing The Levers
Refitting The Suspension
Refittng The Levers
Refittng The Support
Refittng The Position Sensor
Adjust The Sensor
Shimming The Suspension
-CROWN WHEEL AND PINION AND DIFFERENTIAL
Local Manufacturing Tool
Exploded View Of The Bevel Gear
Exploded View Of Differential
Preparation
Removing The Casing
Differential Removal
Removing The Drive Pinion
Refitting The Drive Pinion
Shimmng The Drive Pinion
Dismantling The Differential
Installing The Differential
Shmming The Differential
Refitting The Differential
Refitting The Casing
-4 WD POWER TAKE-OFF HOUSING
General
Declutched Poslion
Clutched Position
Lubrication
Cross-Secton Of The 4-Wheel Drive Housing
Cross-Secton Of The 4-Wheel Drive Housing
Exploded View Of The 4-Wheel Drive Housing
Removing The 4-Wheel Drive Clutch
Removing The Clutch
Refitting The Clutch
Fitting Shims To The Clutch
Fitting Shims To The Shaft
Refitting The Shaft
Coupling The Rear Axlegearbox
-GENERAL
Specific Torques And Sealing Compounds
-HYDRAULIC SOURCE
Description
Location Of Components On Left And Right Side Cover
Exploded View Of Left And Right Side Cover
Internal View Of The Left-Hand Cover
Sectional View Of The Left-Hand Cover
Location Of The Components On The Priority Block
Identification Of Holes And Pipes On Right Cover
Removing The Priority Block
Removal Of Right Cover
Removing The Variable Displacement Pump
Refitting The Variable Displacement Pump
Replacing The Rh Cover
Refitting The Priority Block
Removing The Left-Hand Cover
Refitting The Left-Hand Cover
Removing The Booster Pump
Refitting The Booster Pump
Replacement Of Pump Seals
-REAR LIFT
Location Of Components On Rear Lifting
Exploded View Of Linkage Spool Valve
Removing The Lifting Valve
Refit The Linkage Spool Valve
Removing The Lifting Jack
Dismantling The Linkage Actuator
Refitting The Linkage Actuator
Refitting The Lifting Jack
-ELECTROHYDRAULIC SPOOL VALVE (“DEH”)
Exploded View Of An Electrohydraulic Command Auxiliary Spool Valve
Removing The Spool Valve Block
Refitting The Spool Valve Unit
Changing The Gaskets Between Spool Valves
Changing The Electric Control Block Of A Spool Valve
Removing The Valve Spool
Refitting The Valve Spool
Removing The Valve Spool And Flow Regulator
Refitting The Valve Spool And Flow Regulator
-STEERING
Exploded View Of The Steering Unit
Exploded View Of The Steering Actuator
Remove The Steering Unit
Overhauling The Steering Unit
Refitting The Steering Unit
Preparation For Overhauling The Steering Actuator
Remove The Steering Actuator
Removing The Steering Actuator
Refitting The Steering Actuator
Refitting The Steering Actuator
-COMMON ELEMENTS
–HYDRAULICS 110 UMIN
Description
Technical Description
Technical Specifications
–HYDRAULICS 150 UMIN
Technical Specifications
–HYDRAULIC CIRCUIT AND DIAGRAM 110 L/MIN
40 Km/H Without Braking Valve
40 Km/H Without Braking Valve
40 Km/H With Braking Valve
40 Km/H With Braking Valve
High Pressure Braking 50 Km/H
High Pressure Braking 50 Km/H
–HYDRAULIC DIAGRAM 150 UMIN
High Pressure Braking 40 Km/H
High Pressure Braking 50 Km/H
Spool Valve Unit (40 And 50 Km/H)
–CLAAS COMPONENT NUMBER
Hydraulic Component Family
List Of Hydraulic Components
–HYDRAULIC MEASUREMENT AND CHECKING POINTS 110 UMIN
Variable Displacement Pump Boost Pressure Check
Checking The Pressure Of The ‘load Sensing* Signal And Pressure Of The Variable Displacement Pump
Test With Zero Flow Rate
Test In The Case Of Maximum Flow Rate
Flow Rate Check On An Auxiliary Distributor
Checking The Safety Solenoid Valve
Checking Control Pressure On Electrohydraulic Valves
–HYDRAULIC RECORD SHEETS 110 UMIN
Variable Displacement Pump Boost Pressure Check
Transmission Oil Temperature Included Between 65 And 70 ‘C Pressure Measured On ’9348’ Tap
Checking Pressure Of The ‘load Sensing’ Signal And High Pressure On The Variable Displacement Pump
Zero Flow Rate (No Receiver Supplied)
Maximum Flow Rate On An Auxiliary Distributor
Flow Rate Check On An Auxiliary Distributor
Transmission Oil Temperature At 20 And 80 ‘C Engine Speed 2 200 Rpm
Checking The Safety Solenoid Valve And Control Pressure Of Electrohydraulic Distributors
Checking The Safety Solenoid Valve
Check Of The Actuation Pressure Of Electrohydraulic Distributors
-REAR LIFT
–GENERAL DESCRIPTION
Description
Characteristics
Electronic Console For Rear Hydraulic Lifting ’V22”
Rear Lifting Performance
Operating Laws
–MAXIMUM REAR LIFT PRESSURE CHECK
Maximum Rear Lift Pressure Check
–HIGH PRESSURE HYDRAULIC SECTION
Linkage Spool Valve
Description
Operating Hws
–ELECTRONIC COMPONENTS
Description
Component Layout
Internal Controls
Input’outputs
Operating Laws
Protection
–RESULTS RECORD FORM
Rear Lifting Supply Pressure Check
Maximum Rear Lift Pressure Check
-AUXILIARY SPOOL VALVES
–GENERAL DESCRIPTION
Description
3 Spool Valve Pack
4 Spool Valve Pack
5 Spool Valve Pack
Characteristics
–HIGH PRESSURE HYDRAULIC SECTION
Description
Component Layout
Test And Measurements
Checking The Piloting Pressure Of The Valves
Flow Regulator Check On The Auxiliary Spool Valves
Checking The Hydraulic Power Circuit
–ELECTRONIC COMPONENTS
Description
Component Layout
Input&’outputs
Operating Laws
Switch Of The “Si 94* Auxiliary Hydraulics
Electropilot R75 Cross Command And ‘r76′ Line Commands
External Commands Of 4)55-1, U55-2 U56-1 And U56-2”
Safety Solenoid Valve “Y330”
Controls Of The 3Rd And 4Th Functions
Protection
Degraded Modes
Electrohydraulic Spool Valves
Description
Schematic D Agram
Operating Hws
Neutral Position (A)
-STEERING
–GENERAL DESCRIPTION
Description
Operating Laws
–MECHANICAL PART
Description
Component Layout
Diagram
Characteristics
Adjustment
Toe-In Adjustment
Adjusting The Steering Stops
–HIGH PRESSURE HYDRAULIC SECTION
Description
Component Layout
Characteristics
Measurements And Checks
Checking Maximum Steering Actuator Pressure
–STEERING UNIT
Description
Operating Laws
Neutral Position
Defected Position
Measurements And Checks
Shockproof Valve Opening Pressure Check
–RESULTS RECORD FORM
Checking Maximum Steering Actuator Pressure
Shockproof Valve Opening Pressure Check
-ELECTRICAL SERVICES
–LIST OF ERROR CODES
Error Codes
Description
“Cebis’ Panel
Automatic Climate Control
–“CEBIS” PANEL (MFT A30)
Description
Error Code
Native Code
Sender Module
Light
Cause
Comment
List Of Error Codes
Mfa (A 100)
Tri (A57-1)
Tr2 (A57-2)
Tr3 (A57-3)
Reh (A58)
Sfa (A102)
Bog (A 103)
Eng(A15)
Hyd (A60)
Mft (AЭ0)
Ext (A62)
Vdc (A56)
Tcu (A57-4)
-CONTROL PANEL “WLP”
–GENERAL DESCRIPTION
Description
Technical Description
Technical Specifications
Schematic Diagram
–WORKING LIGHTS
Description
Technical Description
Can Messaging
Technical Specifications
Functional Logic
Schematic Diagram
–CAB LIGHTING
Description
Technical Description
Can Messaging
Technical Specifications
Functional Logic
Schematic Diagram
–ROTATING BEACONS
Description
Technical Description
Can Messaging
Technical Specifications
Functional Logic
Schematic Diagram
–DEFROSTING
Description
Technical Description
Functional Logic
Schematic Diagram
-CAB
Cab lift
-FRONT LINKAGE
–GENERAL DESCRIPTION
Description
Characteristics
Operating Hws
–MECHANICAL PART
Description
Component Layout
–HYDRAULIC PART
Description
Component Layout
Characteristics
Measurement And Check Points
Front Lifting Inspection
–ELECTRONIC COMPONENTS
Description
Component Layout
Input&’outputs
Operating Laws
Switch Of The Si 94 Auxiliary Hydraulics
Onlne Control Of Front Up “R76-1”
External Controls For 59-Г U59-2 Front Lifting
Safety Solenoid Valve “Y330”
Positon Sensor For Rear Lifting Bl 39-Г
Protection
Degraded Modes
-FRONT POWER TAKE-OFF
–GENERAL DESCRIPTION
Description
Identification
Technical Specifications
Operating Laws Of The Electro-Hydro-Mechanical Diagram
–ELECTRONIC COMPONENTS
Description
Component Layout
Input&’outputs
Operating Laws
Measurements And Checks
Checking The Supply Voltage Of The ‘y326′ Solenoid Valve
Checking Resistance Of The ’Y326’ Sotenoid Valve
–MECHANICAL PART
Description
Component Layout
Diagram
Operating Laws
Technical Specifications
Torque Settings
–HYDRAULIC PILOTING PART
Description
Technical Specifications
Component Layout
Tightening Torque Of Hydraulic Components
Test Methods
Checking The Clutch Feed Pressure
Measurements And Checks
Checking The Supply Pressure Of The Power Take-Off On The ’3172’ Socket
Positon Flow To (C)
Positon Flow To (B)
–RESULTS RECORD FORM
Checking The Supply Pressure Of The Power Take-Off On The ‘3172’ Socket
Checking The Supply Voltage Of The Solenoid Valve
Checking Resistance Of The Solenoid Valve
What you get
You will receive PDF file with high-quality manual on your email immediately after the payment.

Reviews
There are no reviews yet